

This is a pretty standard frame shape for a C2 or C3 body
just consult Noland Adams Body Dolly lift work book, anyway he makes it in wood.
Wood and I don't get along , I find it hard to weld

So my box of goodies to modify the basic design

Well, its about half way done,a few more wheels and we got a nice strong body Dolly.
The body will be living there for at least a year or so, by my reckoning and
I want to be able to move it back and forth to the painters and such without any problems.


The finished dolly, stored away up in the roof line, where it will live
in the dark distant future when all the cars are finished........ha ha
The next problem, now that I have a dolly to put the body on, is to get the body off The fact that I cannot get enough height to use the lift strap kit from Zip, which I bought and then worked out it would be useless for me, Is that a single point lift from a hoist, means I cannot change the sling length enough while Iam lifting to get the body to lift dead straight. So after spending a lot of time looking at the old photos of the Corvette production facilities and the way they lifted the body on and off I decided do make something sililar but with a movable centre of mass device that I could adjust on the fly, much like the engine lift arms .

This is what I am trying to duplicate

Here are the bits to start making my version of it.

This is the centre of mass unit before the arms are attached.
The nut on the left, drives a T nut up and down the slot,
an eye bolt screws in the the top of it and is attached to the hoist
The nut on the left, drives a T nut up and down the slot,
an eye bolt screws in the the top of it and is attached to the hoist

Thats the main spider constructed, attached to the gantry hoist, next I need arms to attach to the spider


The finished body crab attached and ready to lift on the left, away we go on the right
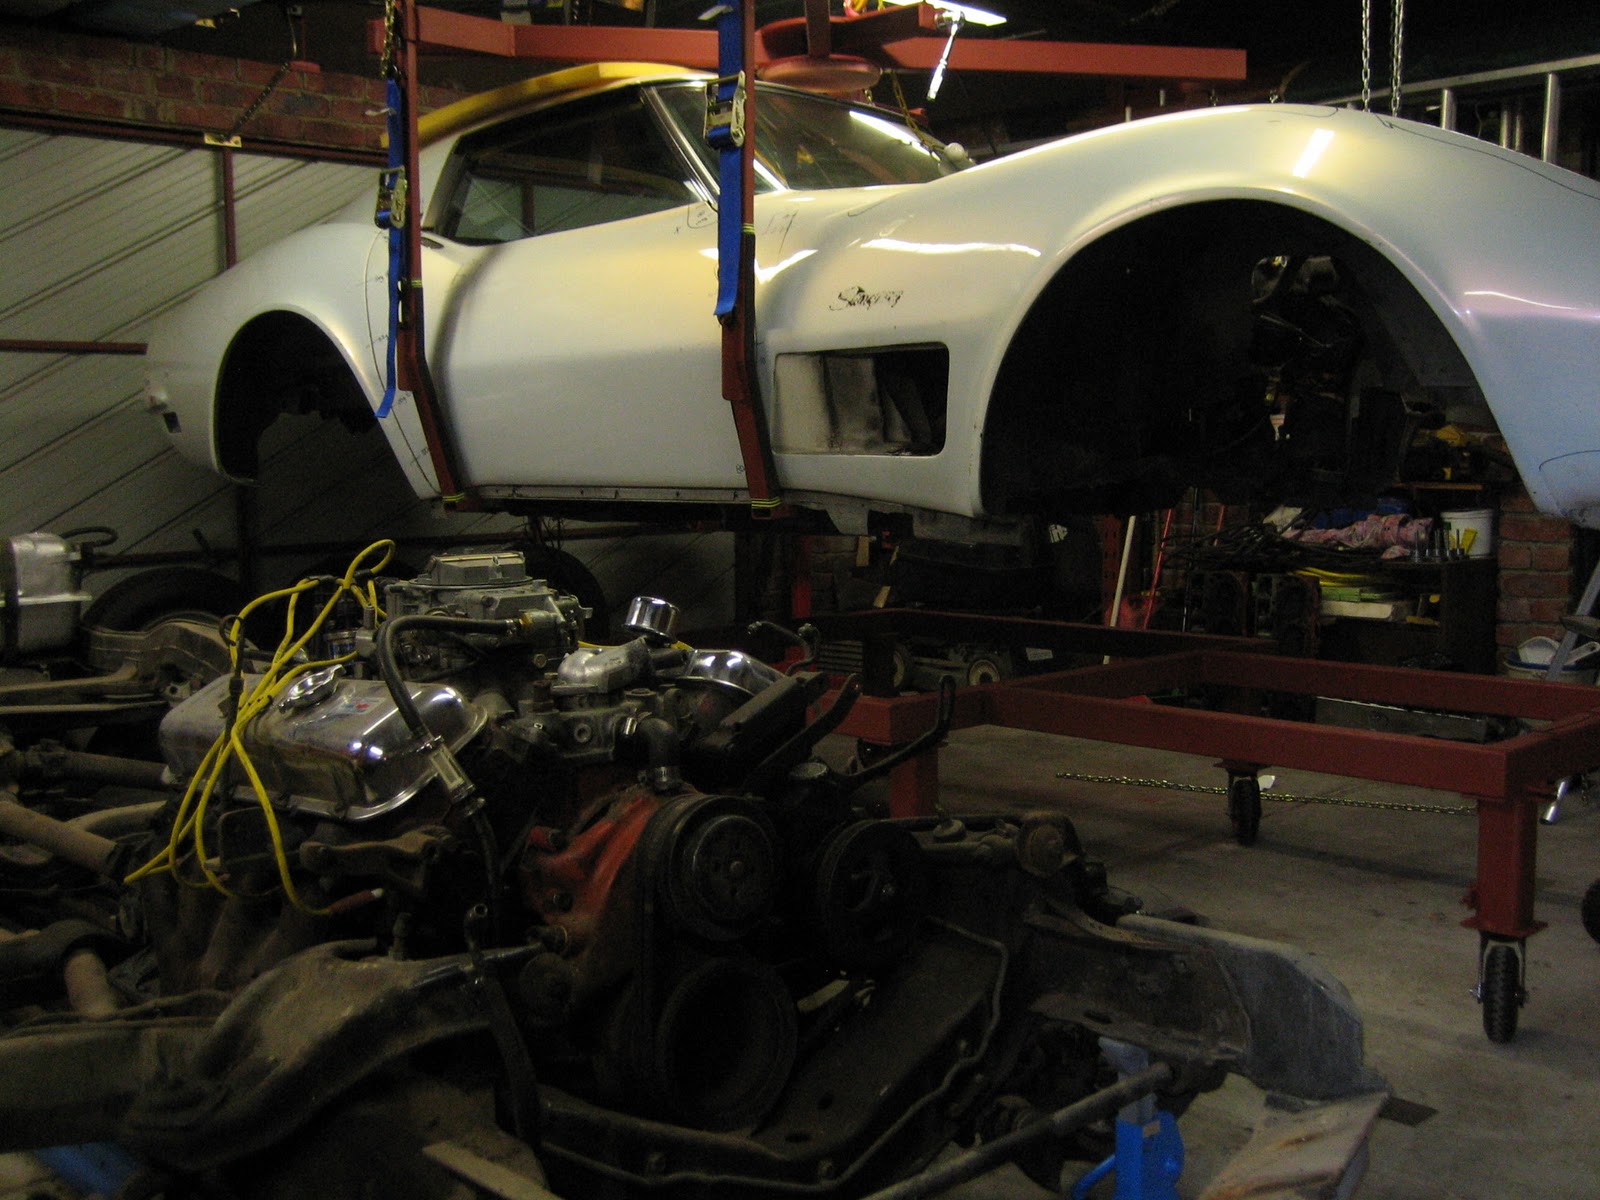

It worked a treat , luckily I had my technical advisor on hand,
Lexie gave it the wag of confidence and we were away !!

So that gets us to Chassis this side

Body the otherside, I guess Pearl is having an out of body experince for the next year or so!!
Stay tuned more to come!!
Pete,
ReplyDeleteWow. I wish I had your metal working talent. I had the same lack of headroom with my lift strap kit. My wife heard me say damn, she came out to the garage and saw the problem, then took the straps to her seamstress and had them shortened the next day. It solved the problem but I am sure it puts extra stress on the doors. Then there's your gantry crane. Wow.
Thanks John
ReplyDeleteI was taught well by my Dad, I'm third Geneation
at my trade, I'm a toolmaker over here, I think thats a journeyman over your way. The one drawback is everything I build will outlast me!!
Good Idea with the seamstress. I put up a link to Jerry Bramlet, he has some interesting notes on Tuning the FI the Vette article is good too, may be of some use to you
cheers Pete
I've been visiting Jerry's site for about a year now. Everytime I go to his site I learn something new. I open up his web page thinking I am pretty smart then I close the web page realizing how little I know. By the way, your metal works will out last your grand children.
ReplyDeleteFinally got to look at what your doing. You are a man of many talents Pete. Looking forward to seeing more.
ReplyDeleteThanks Richard,
ReplyDeleteOne does what one can you know!!
Really well built solution! Thanks for the ideas!
ReplyDelete